Blog

Good Egg Crochet Pattern

U.S. crochet terms:
Magic ring (MR)
Single Crochet (SC)
Increase (INC)
Invisible decrease (INVDEC)

A number in parenthesis at the end of a row is the number of stitches that row should have when completed.

This project is crocheted from the top down. It is amigurumi, so no joining or chaining at the end of each row.

Materials used:

  • 3.5mm hook
  • Worsted weight acrylic yarn
  • 9mm safety eyes
  • Black embroidery floss
  • Embroidery needle
  • Scissors
  • Fiberfill for stuffing
Optional:
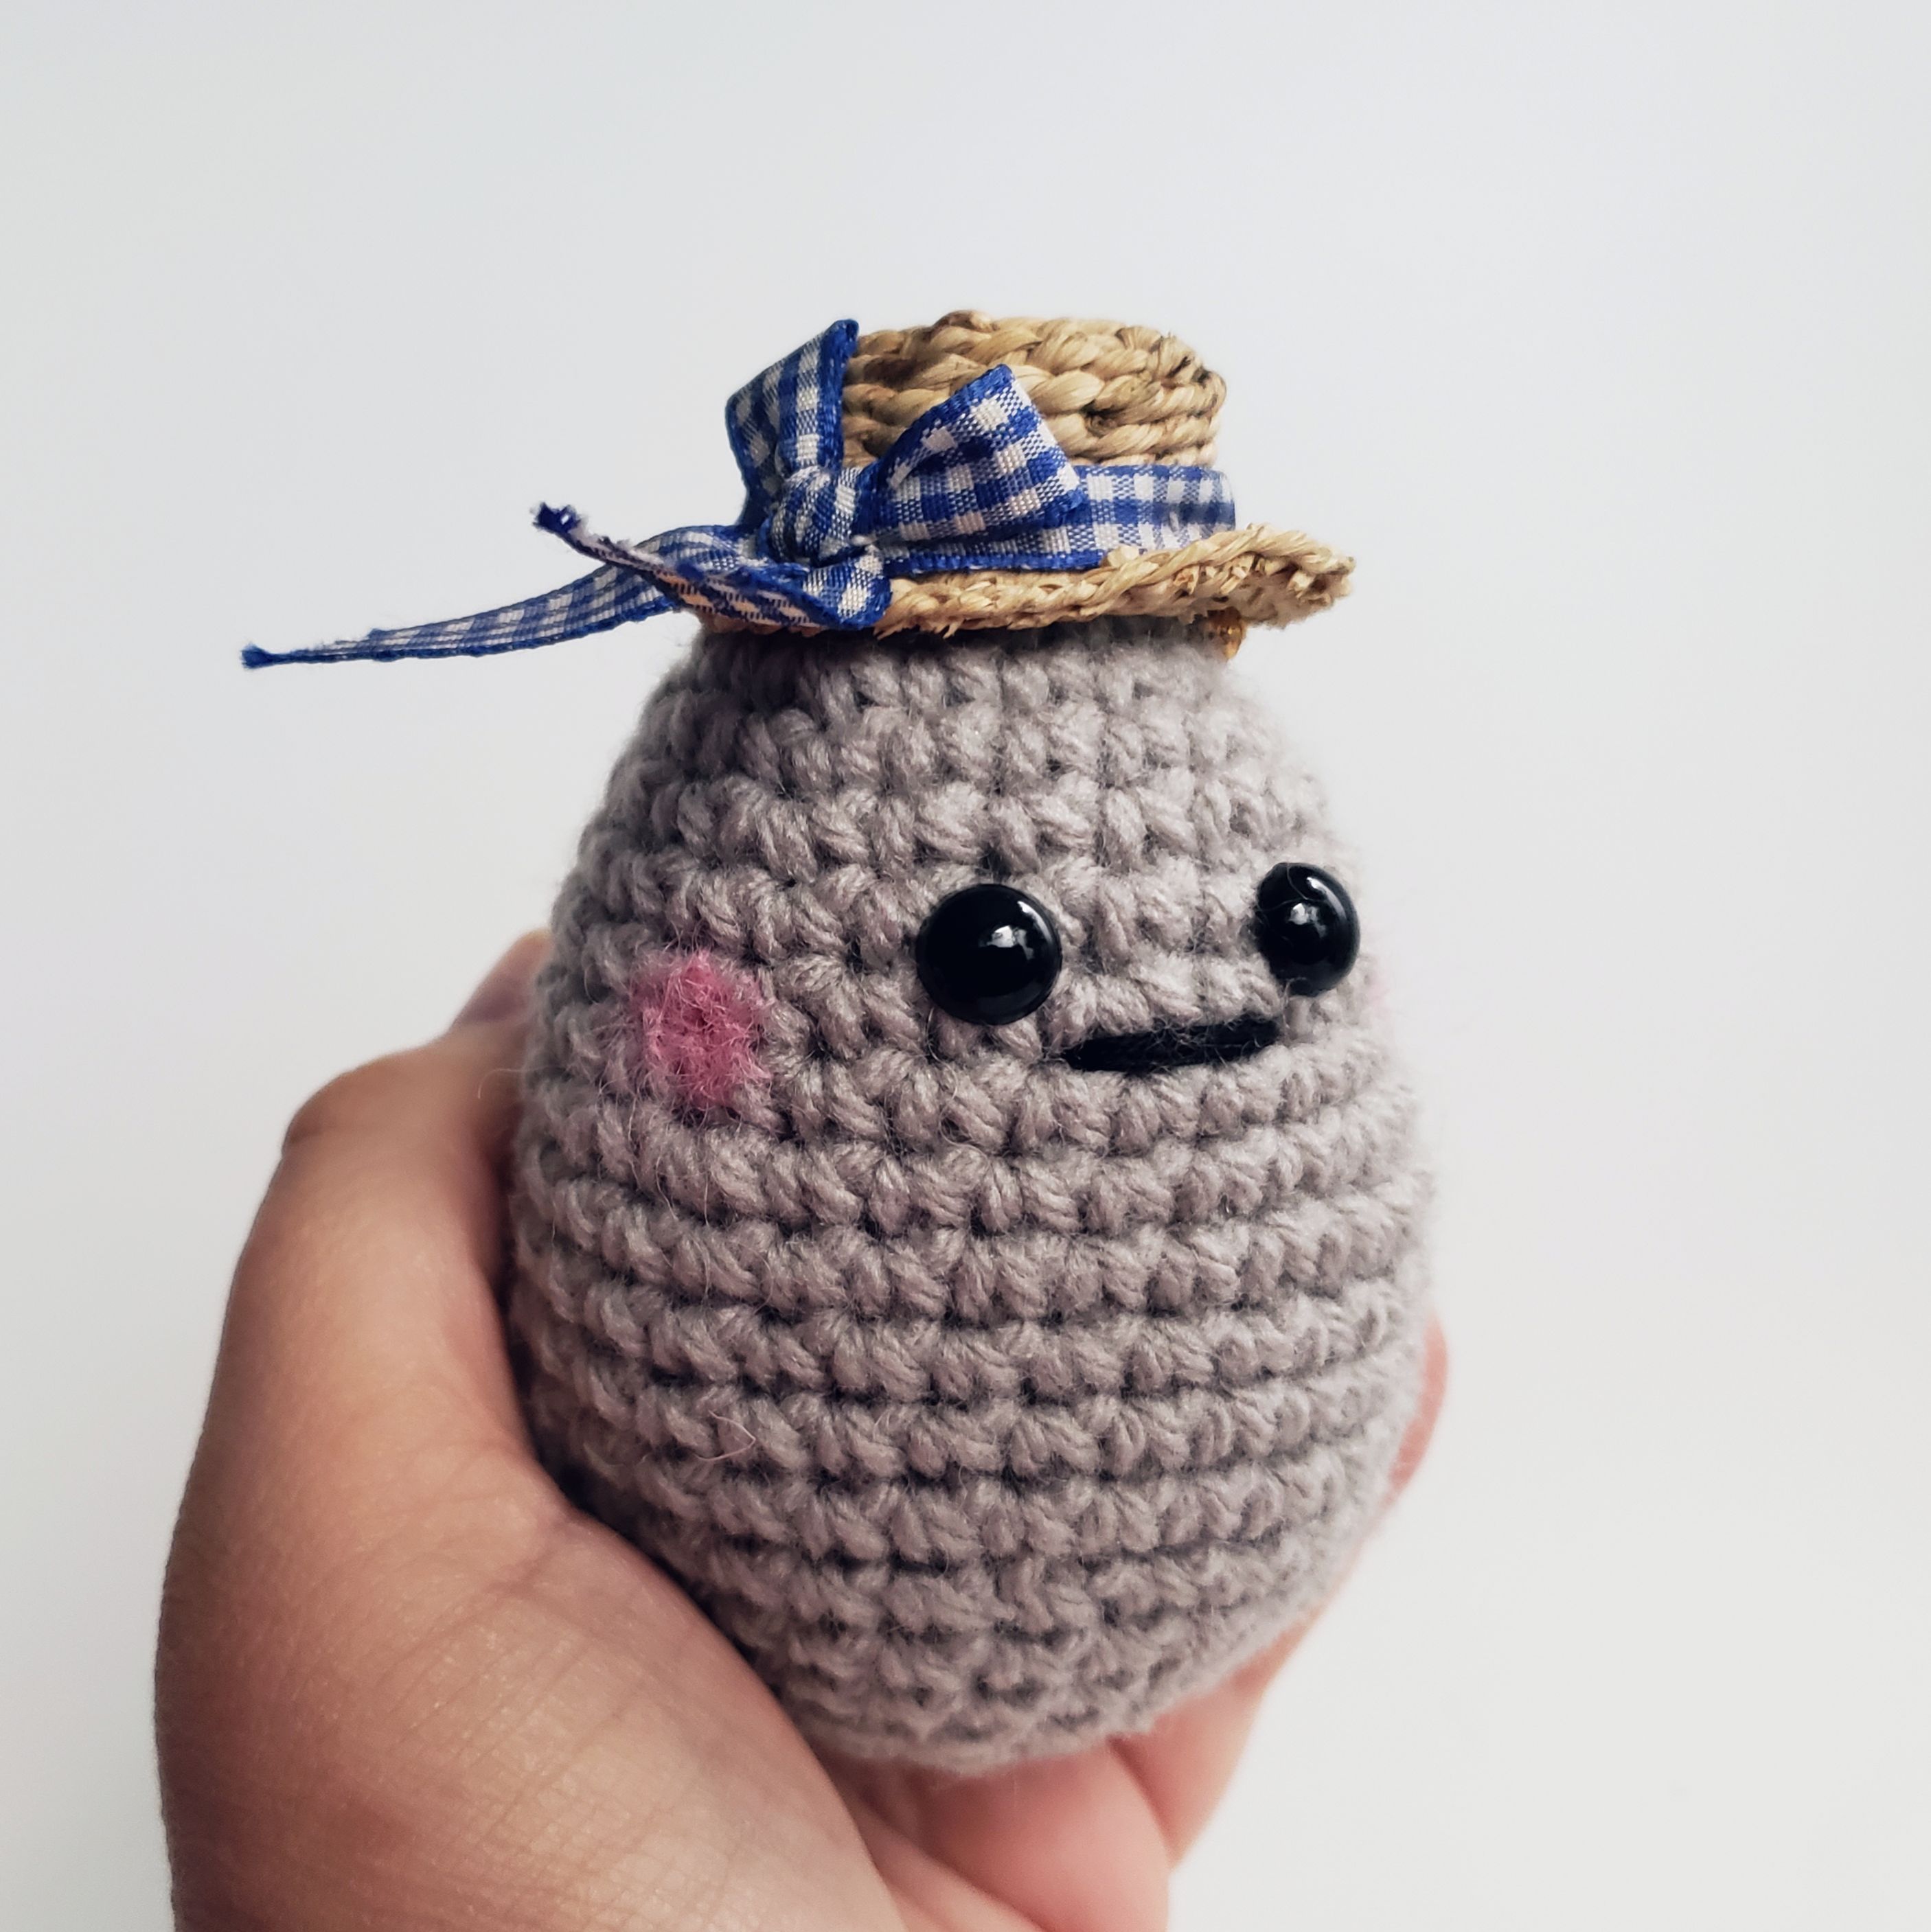
  • Pink fiber and a felting needle for rosey cheeks. Alternatively you could glue on pink felt circles or use pink makeup. Whatever you are most comfortable with.
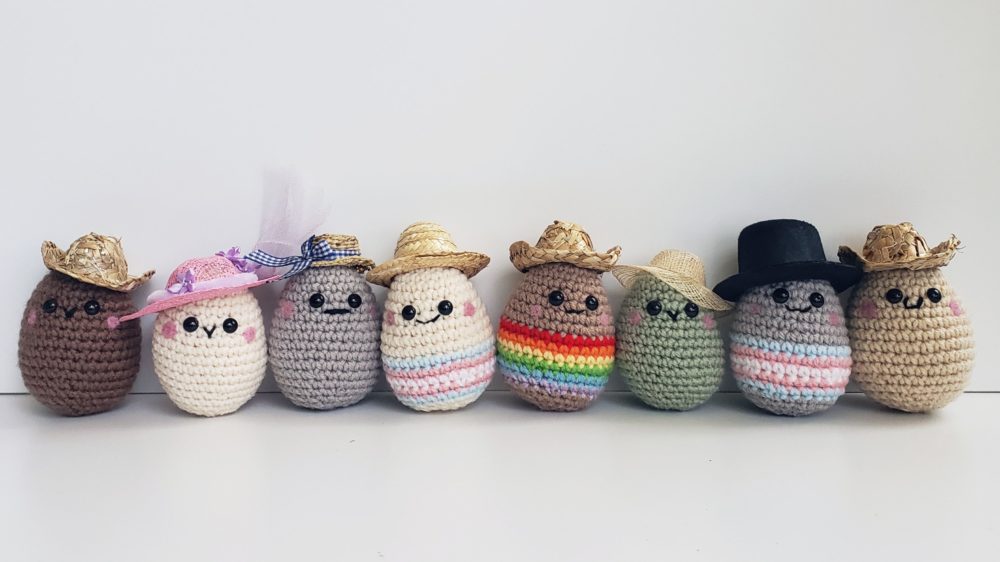
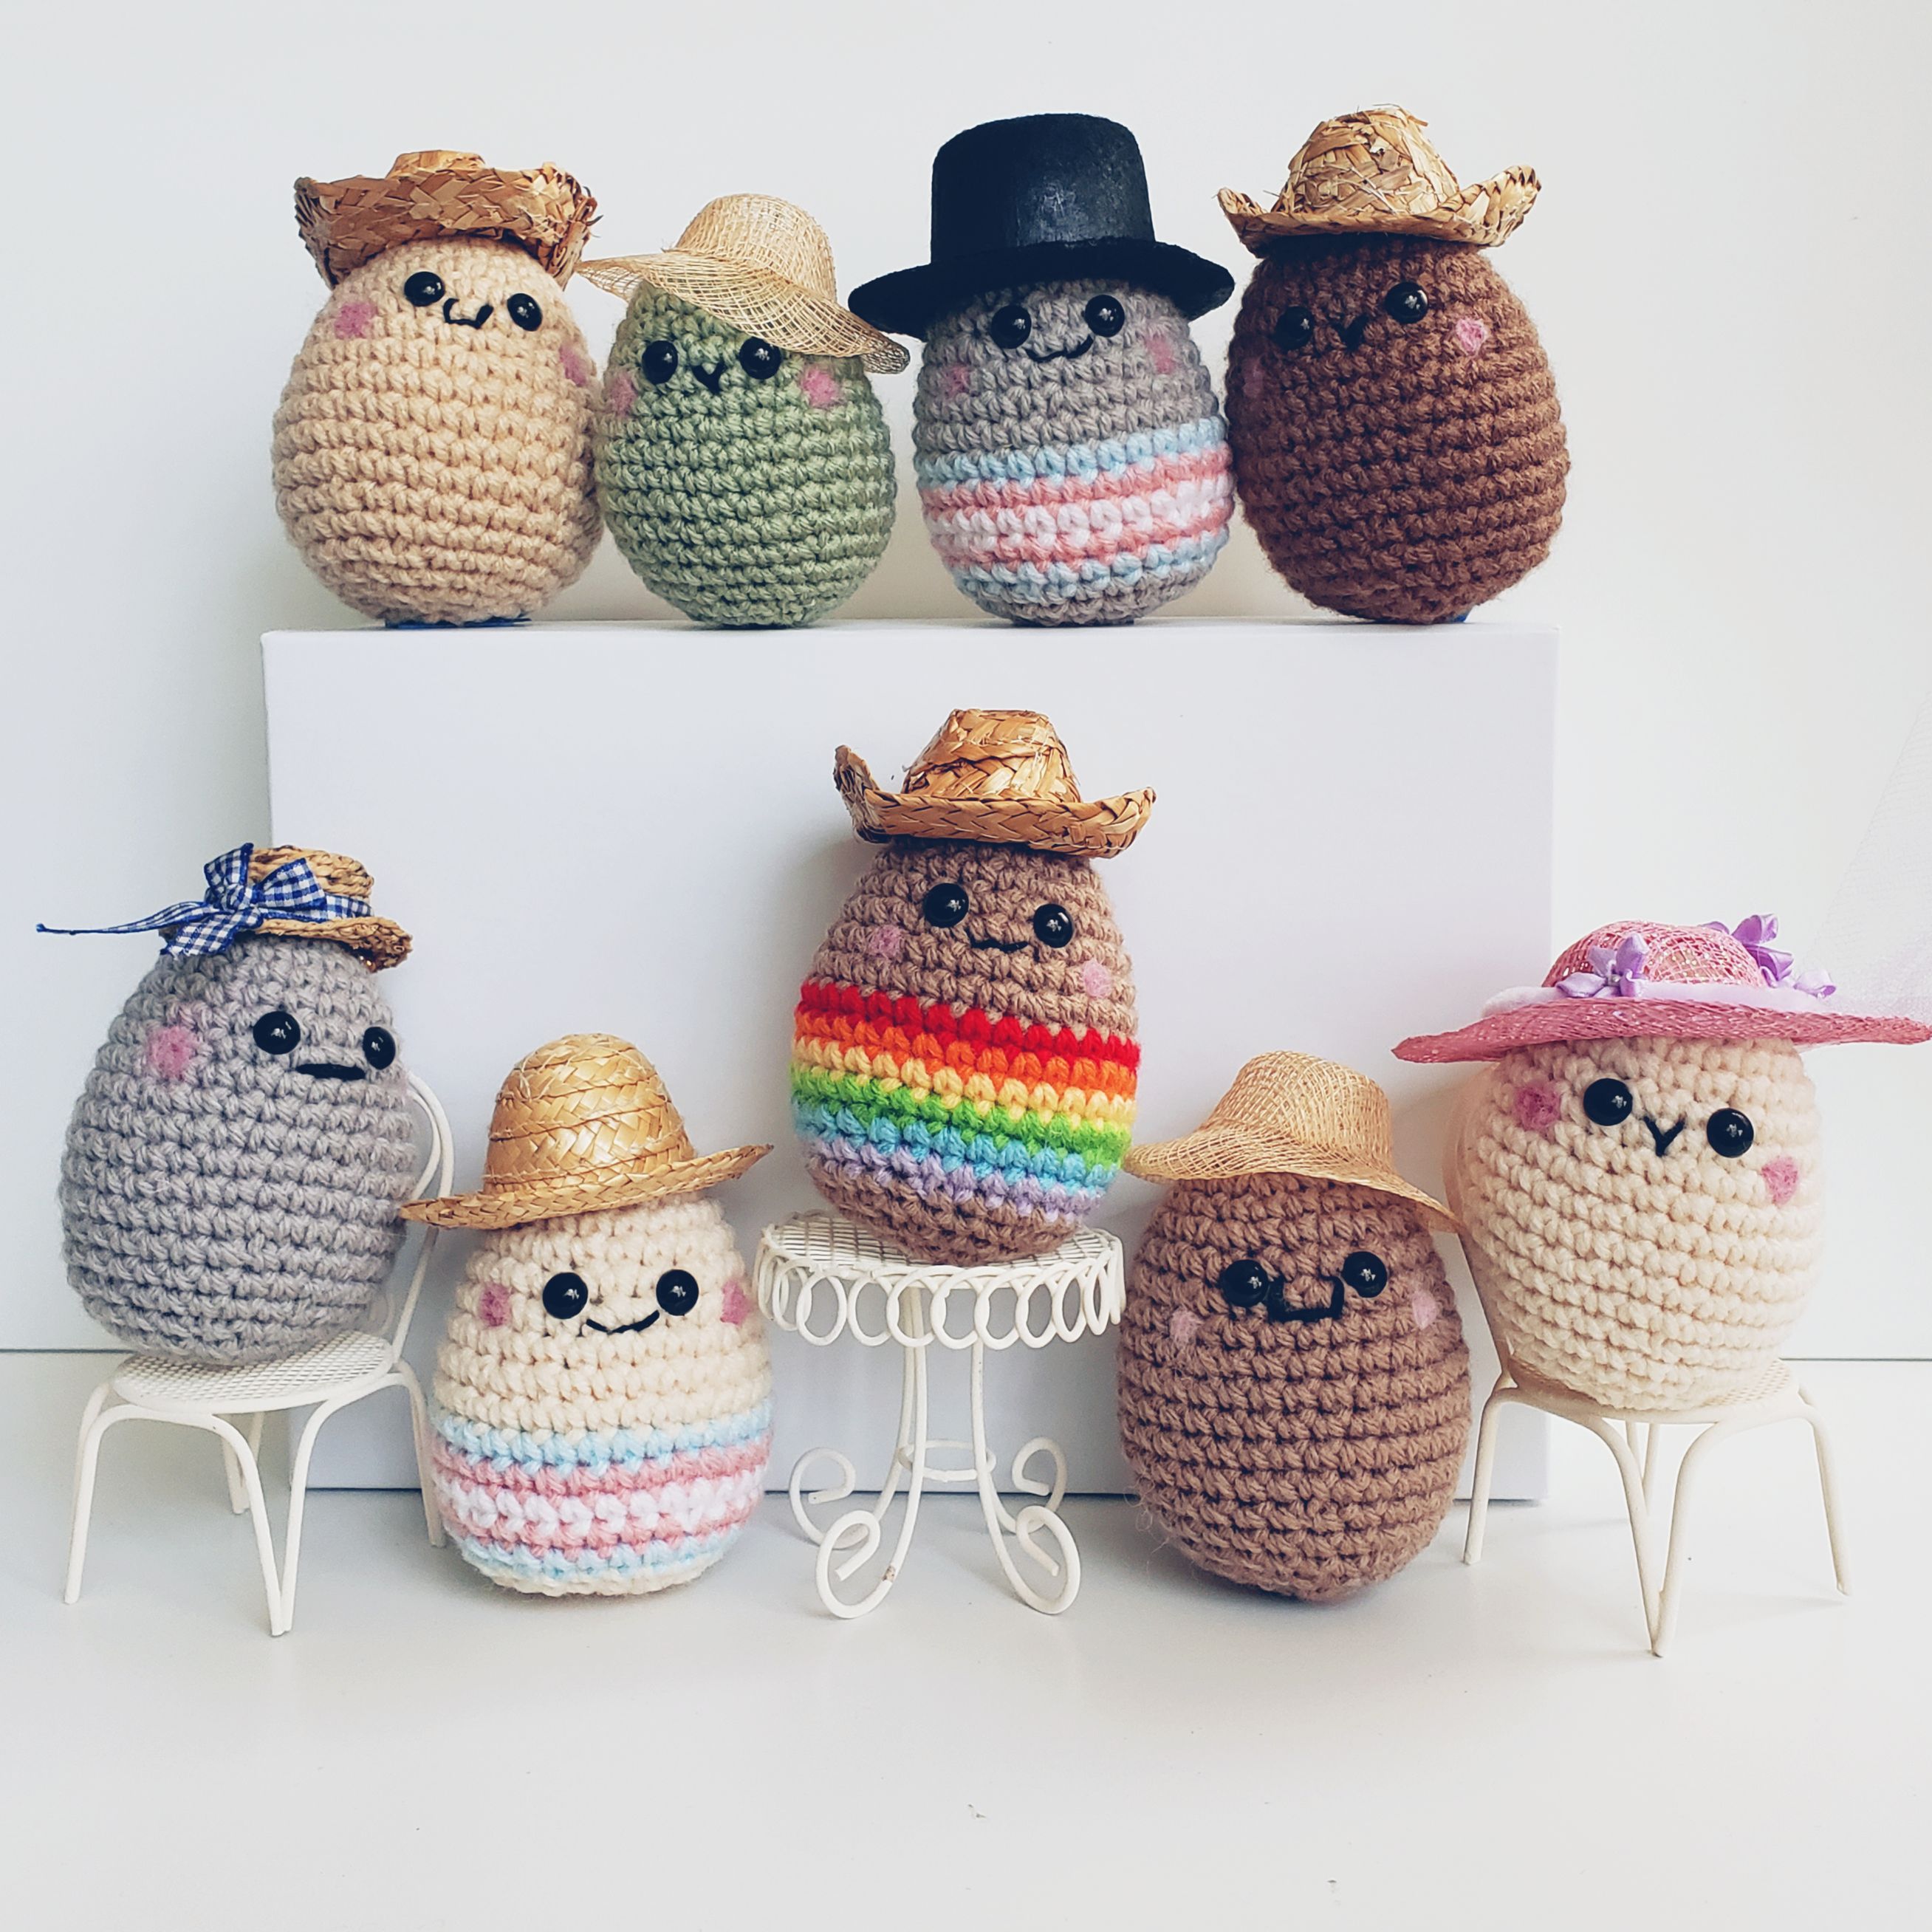
  • Tiny hats! I find them locally at Joann’s and at garage sales and thrift shops. I’ve also seen some fun results searching on etsy. At the bottom of this page I included a photo of an egg without a hat.
NOTES:

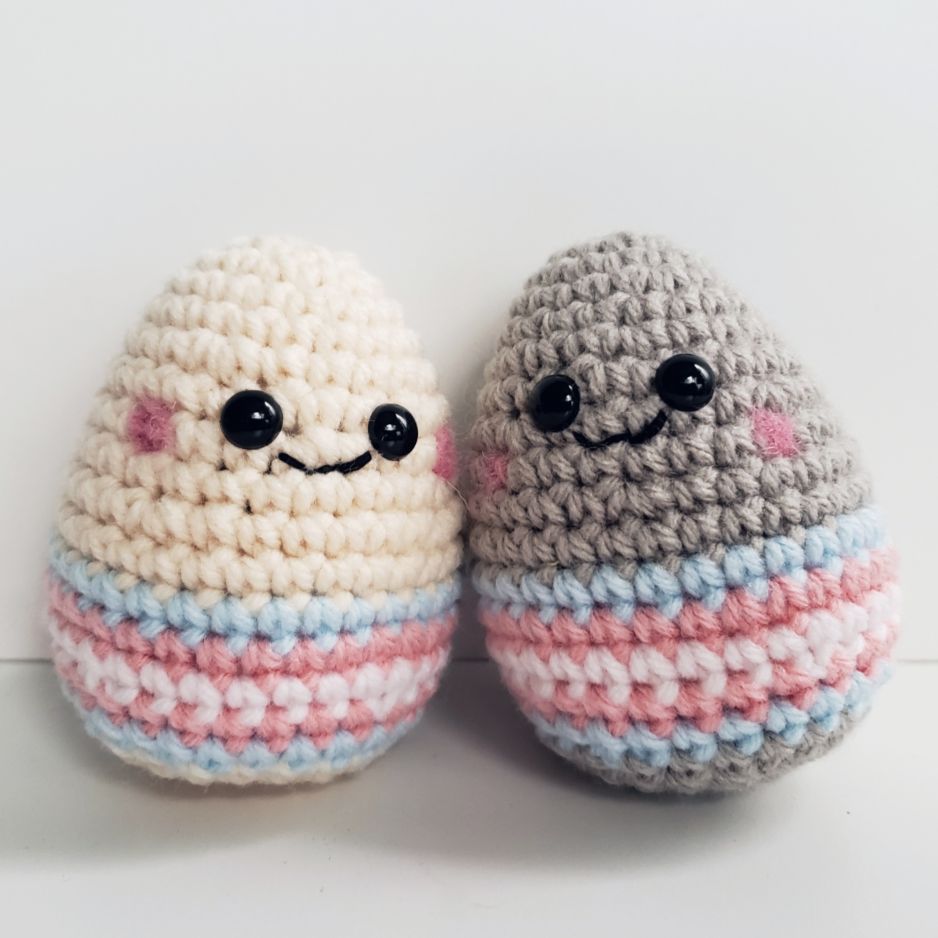
The eyes are placed between rows 7 and 8 with 2 empty spaces between the eyes. The mouth is embroidered one row below the eyes with black embroidery floss. Stuff with fiberfill as you go. I do a light stuffing, only using enough for the egg to hold it’s shape.

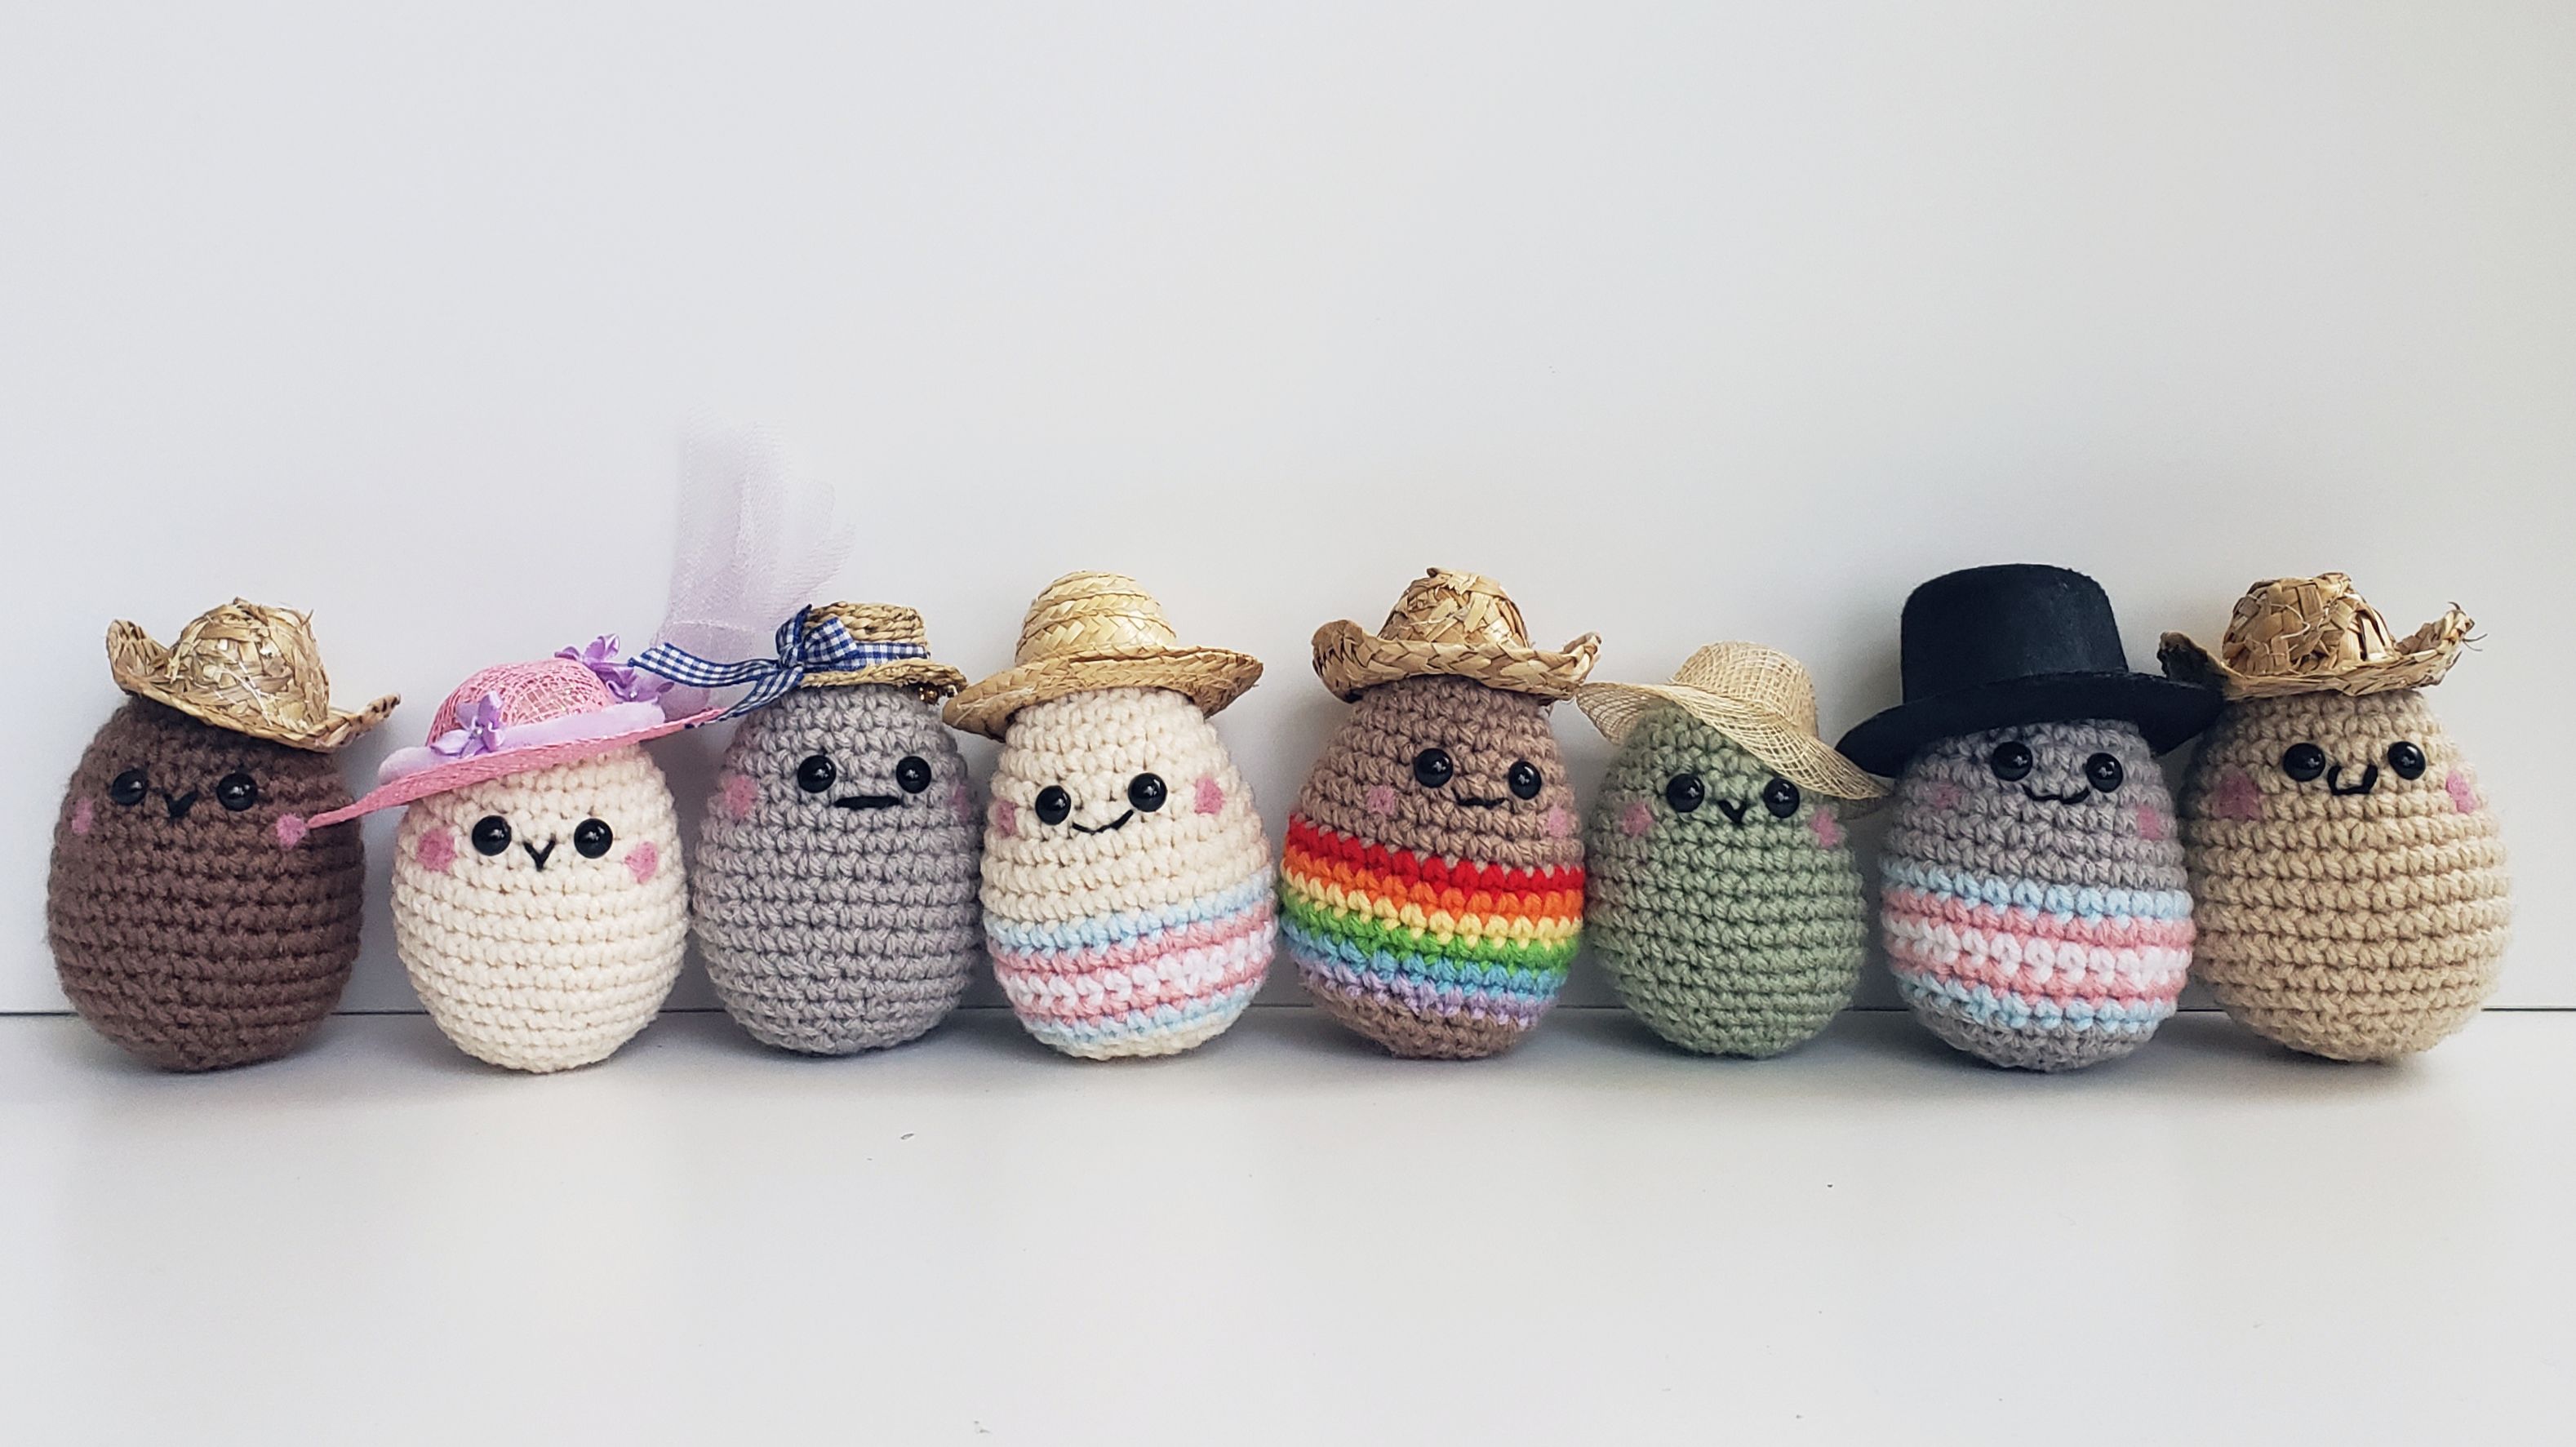
Looking to make a pride flag on your egg? Every Good Egg knows #yallmeansall.
For the rainbow flag I started with red on row 11:
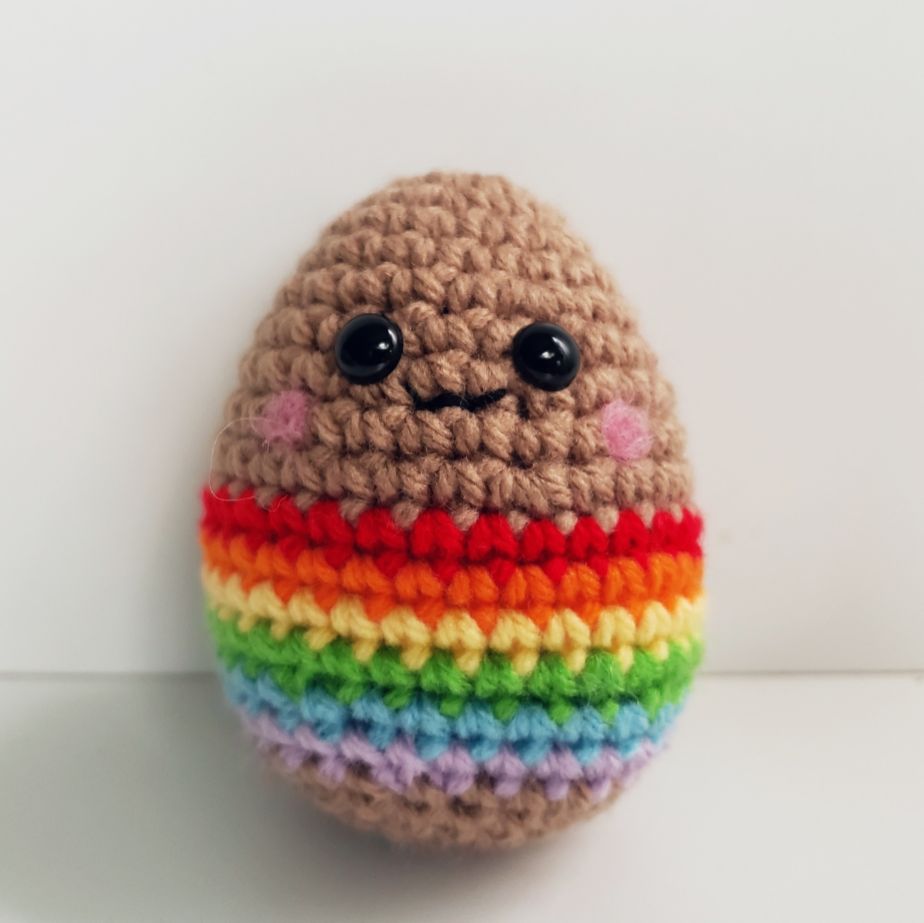
1-10 eggshell color
11- red
12- orange
13- yellow
14- green
15- blue
16- purple
17-21 eggshell color
For the trans flag I started on row 12:
1-11 eggshell color
12- baby blue
13- soft pink
14- white
15- soft pink
16- baby blue
17-21 eggshell color
For any other flags or designs, line it up so the last row of the flag is on row 16. Anything after row 16 curves under the egg.

Pattern:

Row 1
6SC in a Magic Ring (6)
Row 2
6INC (12)
Row 3
1SC, INC, 2SC, INC, 1SC, INC, 2SC, INC, 1SC, INC (17)
Row 4
3SC, INC, 4SC, INC, 3SC, INC, 4SC (20)
Row 5
20SC (20)
Row 6
2SC, INC, (4SC, INC) x3, 2SC (24)
Row 7
24SC (24)
Row 8
(5SC, INC) x 4 (28)
Row 9
28SC (28)
Row 10
3SC, INC, (6SC, INC) x 3, 3SC (32)
[Place eyes and embroider mouth]
Rows 11-14
32SC (32)
Row 15
3SC, INVDEC, (6SC, INVDEC) x3, 3SC (28)
Row 16
28SC (28)
Row 17
(5SC, INVDEC) x4 (24)
Row 18
2SC, INVDEC, (4SC, INVDEC) x3, 2SC (20)
[Start stuffing the egg with fiberfill and continue stuffing as you go.]
Row 19
(3SC, INVDEC) x4 (16)
Row 20
(1SC, INVDEC) x5 (11)
Row 21
3INVDEC, leave the rest of the stitches unworked and sew shut.

Finishing touches:

Add rosey cheeks and a tiny hat. (The note section at the top of the page has more info on these options.) Take a photo. Post it on Instagram. Tag @KaminaKapow so I can say hello to all the Good Eggs out there.

Here’s a fun one for Easter using Loops & Threads Swirled Ombre yarn in the color ‘Muted Bright’:
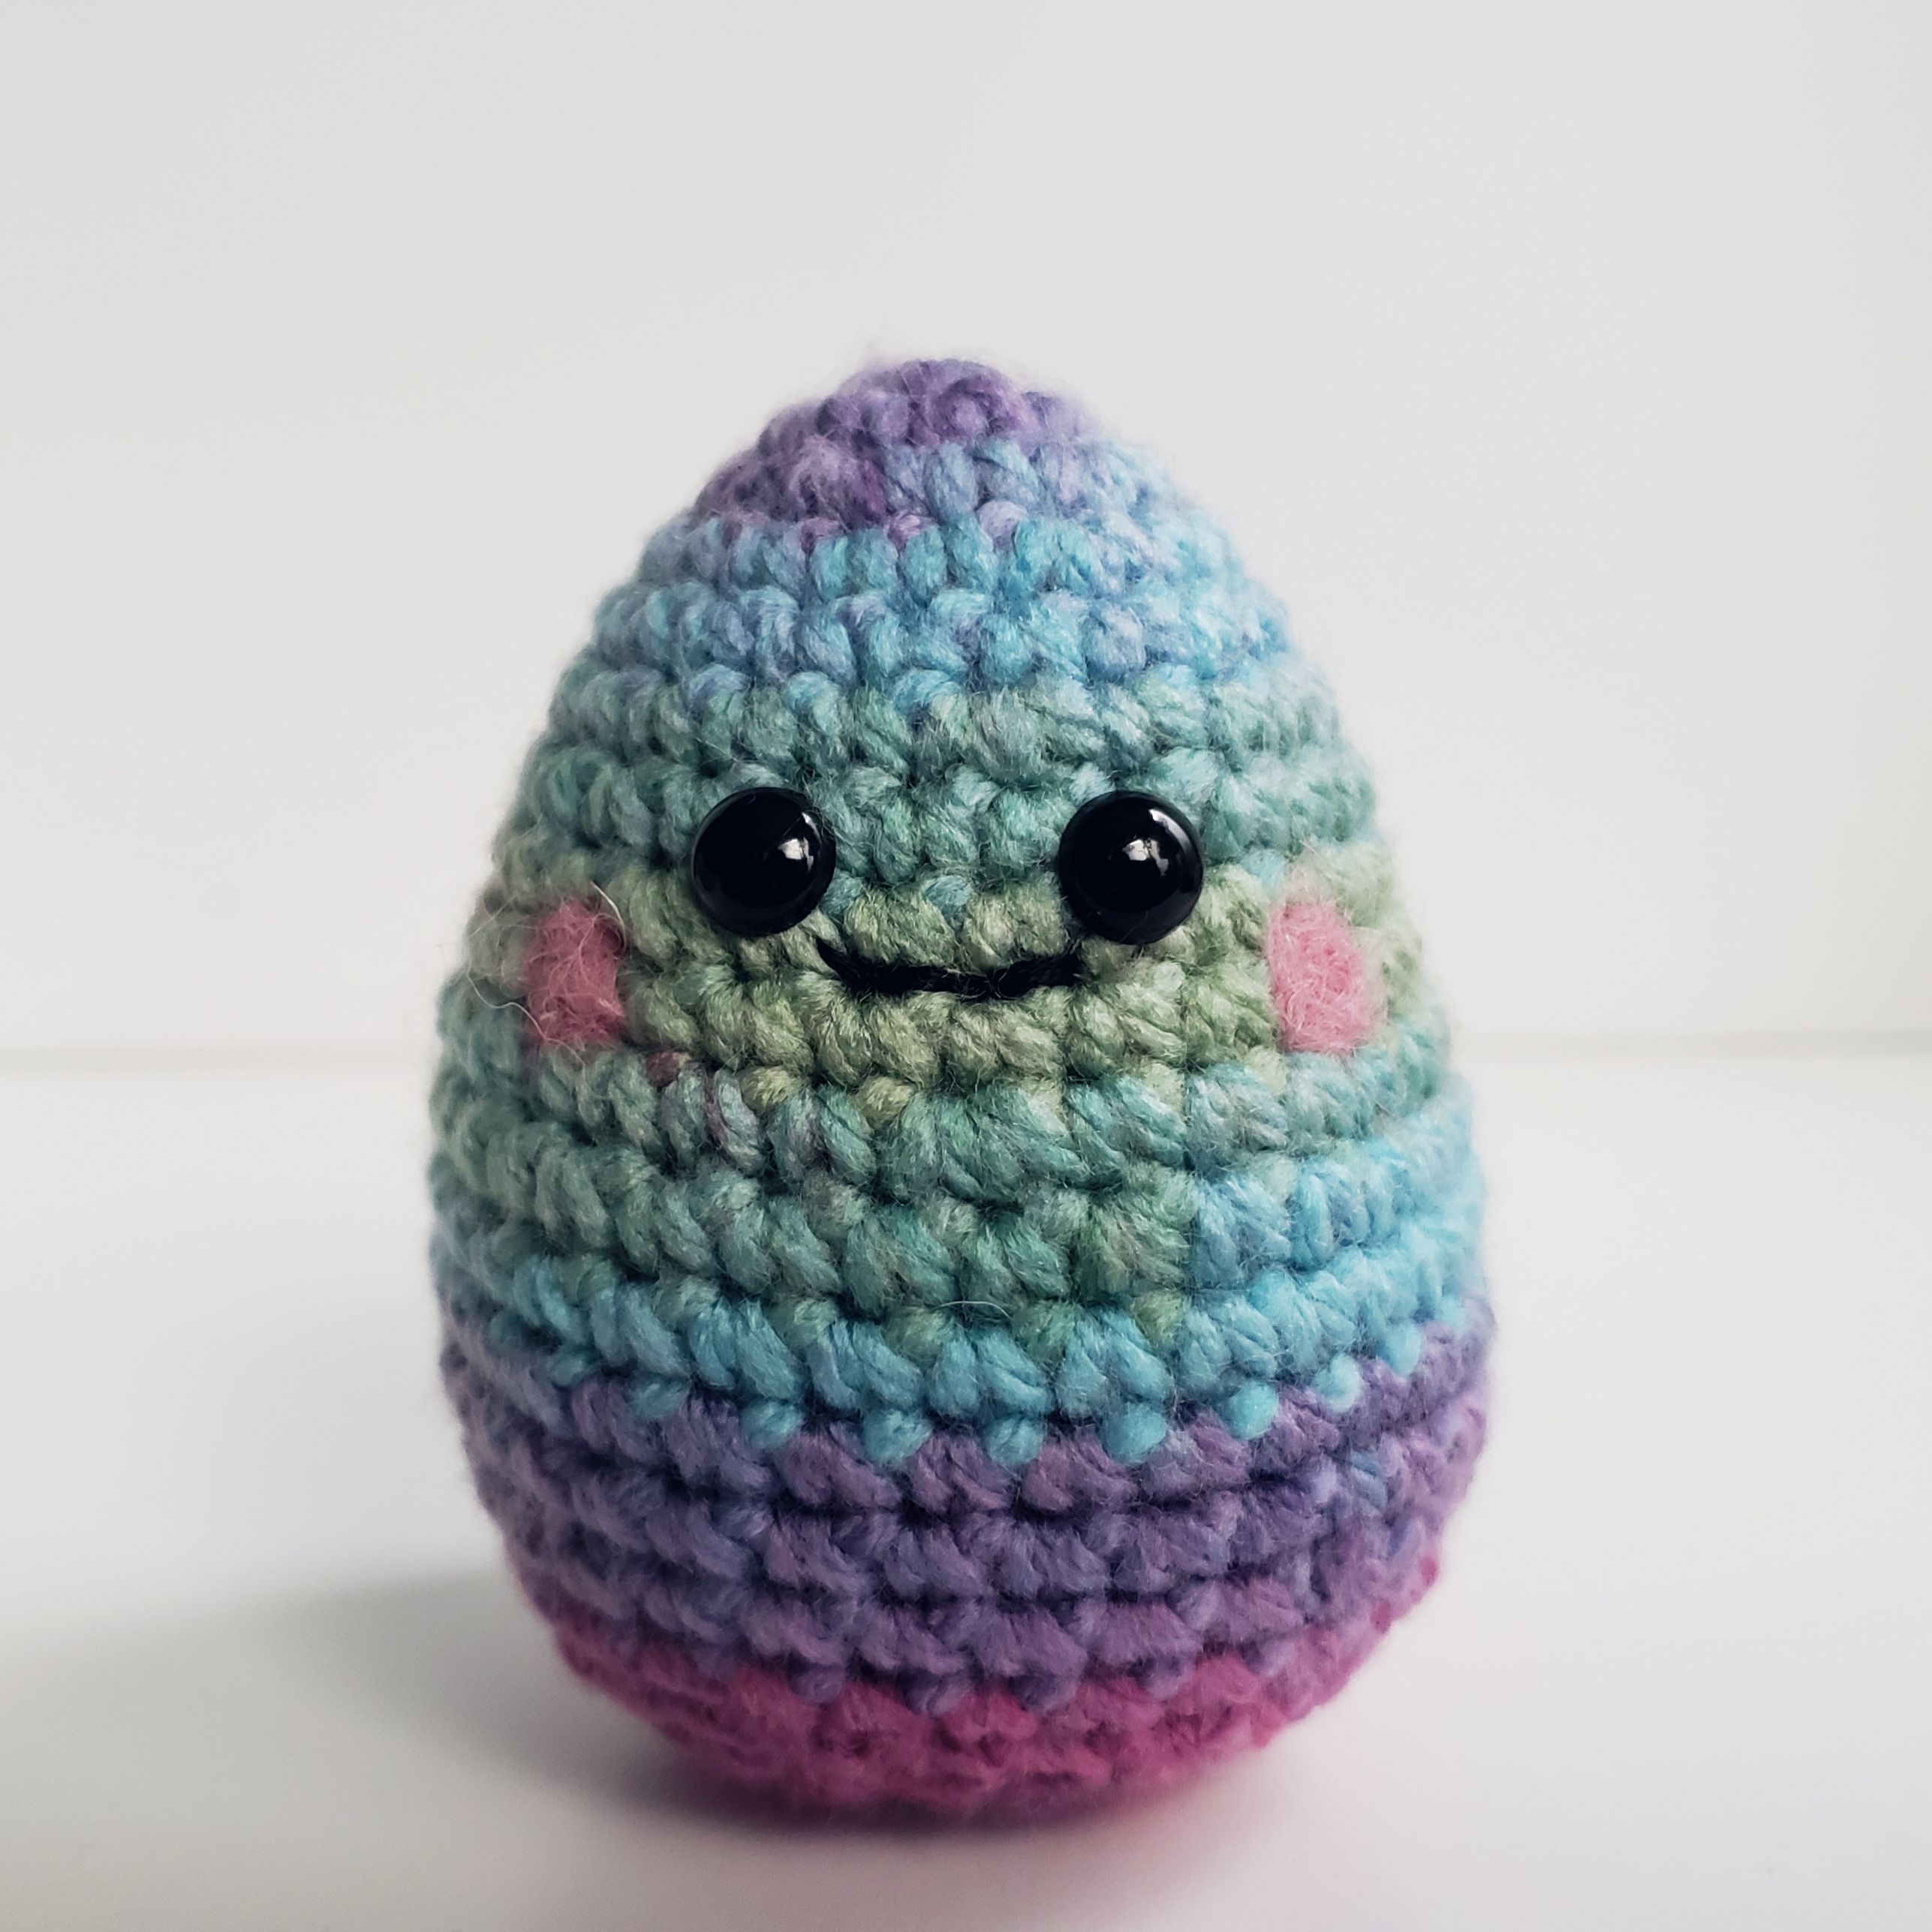
©KCP Galleries 2019

SEAMLESS CROCHET DONKEY PATTERN

Pattern temporarily unavailable.

The PDF is 9 pages with written instruction and many helpful photos.

Difficulty: ADVANCED. My 12 testers rated this pattern a 7/10 difficulty. Most of my testers rated themselves at an intermediate skill level (not advanced) and were able to make this doll because the instructions and photos are detailed. However, they all reported it was a challenging pattern. The crochet part is rated easy to intermediate; the seamless technique is rated ADVANCED. There are detailed photos to help. 

Size: Approximately 6” to 7” tall. If you choose to use other yarn weights or hook sizes, the size will vary.

There is a page of color and style ideas that includes yarn brands and colors used.

Techniques: 
(US term) crochet.
Amigurumi style (worked in one continuous round without joining)

Crochet stitches: 
MR: Magic Ring
ch: Chain
sl st: Slip Stitch
sc: Single Crochet
sc2tog: Single Crochet Decrease
invdec: Invisible Decrease
hdc: Half Double Crochet
inc: Increase Single Crochet

Materials needed:
3.5mm (E) hook
Worsted Weight (4) yarn in 3 colors (body, hair, nose)
7.5mm or 9mm safety eyes
Fiberfill stuffing
Tapestry needle
Scissors
Stitch markers (10)

Text and Photos – Copyright ©2018 Kamina Kapow. All rights reserved.

This pattern is for personal use. Do not duplicate or distribute. You may sell finished dolls.

Free Crochet Pickle Pattern

20170813_173413This is a free pickle pattern, you’ll have to improvise the face if you want to make Pickle Rick. He has many different expressions to pick from, so pickle your favorite Rick and get to it.

U.S. crochet terms:
Magic ring (MR)
Single Crochet (sc)
Double Crochet (dc)
Increase (inc)
Invisible decrease (InvDec)
Bobble stitches are either made with 2dc or 3dc and noted in ( ) after each bobble.

Materials used for pickle:
Red Heart in color Lettuce
3.5mm hook
Tapestry needle
Scissors
Fiberfill

Materials used for Rick:
Felt (light blue, white, black, red)
Glue
Black Embroidery thread
Embroidery needle
Scissors

Pickle Pattern
You can start stuffing at any point and stuff as you go, or you can wait until the end. Your choice.

Row 1– MR, 6sc (6)
Row 2– Inc around (12)
Row 3– (2 sc, inc) x4 (16)
Row 4– (4 sc, inc) x3, 1 sc (19)
Rows 5– 9sc, inc, 9sc (20)
Rows 6-10– 20sc (20)
Row 11– 1sc, bobble (3dc), 18sc (20)
Rows 12-16– 20sc (20)
Rows 17-18– 10, bobble (2dc), 9 (20)
Rows 19-22– 20sc (20)
Row 23– 5sc, bobble (2dc), 14 (20)
Row 24– 20sc (20)
Row 25– 8sc, bobble (2dc), 11sc (20)
Row 26– 20sc (20)
Row 27– 9sc, InvDec, 9sc (19)
Row 28– 1sc, (4sc, InvDec) x3 (16)
Row 29– (2sc, IncDec) x4 (12)
Stuff the body
Row 30– InvDec around and sew closed

Instagram | Ravelry

20170813_173413

Amigurumi Snowman Pattern

KCP_0009_72Hello Crafters. This is my first time sharing a pattern I’ve created.  Tell me in the comments how it worked for you. If you like the pattern I’d appreciate it if you share this page on pinterest and/or link back to my site or my instagram @kaminakapow.

You need to know how to crochet in the amigurumi style for this pattern.

Finished size: About 3.5 inches
Skill Level: EASY

Materials Used:
Scissors
yarn needle
3.75mm (F) hook
9mm safety eyes
half of a brown pipe cleaner
White and orange yarn in worsted weight
I used Red Heart (white) and Red Heart Soft (tangerine)

Stuffing

Stitches:
MR – Magic Ring
CH – Chain
Sl St – Slip stitch
SC – Single crochet
INC –  increase
DEC – decrease (I always use the invisible decrease technique)

My shorthand translated to longhand using row 5 as the example:
Shorthand row 5: 4, INC, 10, INC, 4 (22)
Longhand row 5: single crochet 4 times, increase in next, single crochet 10 times, increase in next, single crochet 4 times. (when finished there are 22 stitches on this row)

Pattern:
BODY
Starting at the top of the head with white
1. MR, 6 SC in ring (6)
2. INC in each (12)
3. 1, INC, 2, INC, 2, INC, 2, INC, 1 (16)
4. 3, INC, 3, INC, 3, INC, 3, INC (20)
5. 4, INC, 10, INC, 4 (22)

6. SC around (22)
7. 4, DEC, 10, DEC, 4 (20)
8. DEC, 3, DEC, 3, DEC, 3, DEC, 3 (16)
9. 1, DEC, 2, DEC, 2, DEC, 2, DEC, 1 (12)
10. 1, INC, 2, INC, 1, INC, 2, INC, 1, INC (17)
11. 2, INC, 3, INC, 3, INC, 3, INC, 2 (21)

12. 3, INC, 6, INC, 6, INC, 3 (24)
13. 10, INC, 13 (25)
14. SC around (25)
15. 13, DEC, 10 (24)
16. 3, DEC, 6, DEC, 6, DEC, 3 (21)
17. 2, DEC, 3, DEC, 3, DEC, 3, DEC, 2 (17)
18. DEC, 1, DEC, 2, DEC, 1, DEC, 2, DEC, 1 (12)
Leave a long tail for sewing.

Put eyes in between the 5th and 6th row. I placed them with 3 empty spaces between the eyes.

NOSE
1. Ch 5, turn
2. starting at 2nd from hook, sl st in first 2, SC in last 2
Sew nose on between eyes. I lined the top of the nose up with the top of the eyes.

BASE
1. MR, 6 SC in ring (6)
2. (1, INC) repeat around (9)
3. (2, INC) repeat around (12)
4. (3, INC) repeat around (15)

KCP_0014_72x
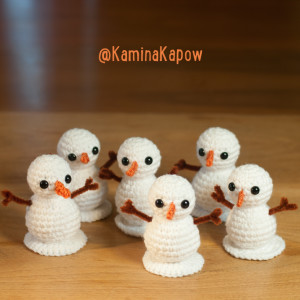
The base curls a bit. Pay attention to which direction it curls and sew it on according to your preference. In this photo of 6 snowmen, half of them have the base sewn on curling up, and half of them have the base sewn on curling down.

Stuff the body and sew it to the base. Fold the end of a pipe cleaner over so the end is soft and won’t catch on the stuffing. Push the pipe cleaner through the body and out the other side, leaving an equal size of pipe cleaner on each side of the body. I made the hands by folding the end over, and then folding that back halfway. Use your yarn needle to sew in any loose ends.

Optional: To give the body a more distinct shape, I take a piece of leftover white string and tie it tight around the neck with a double knot. The ends are sewn into the body.

Instagram

© 2015 KCP Galleries
All rights reserved.
You may not sell/redistribute/publish this pattern. Finished products made from this pattern may be sold by indie crafters at local bazaars or shops provided you credit Kamina Kapow as the designer. They may not be sold online.